Get online with MATE Connect (IPoE)
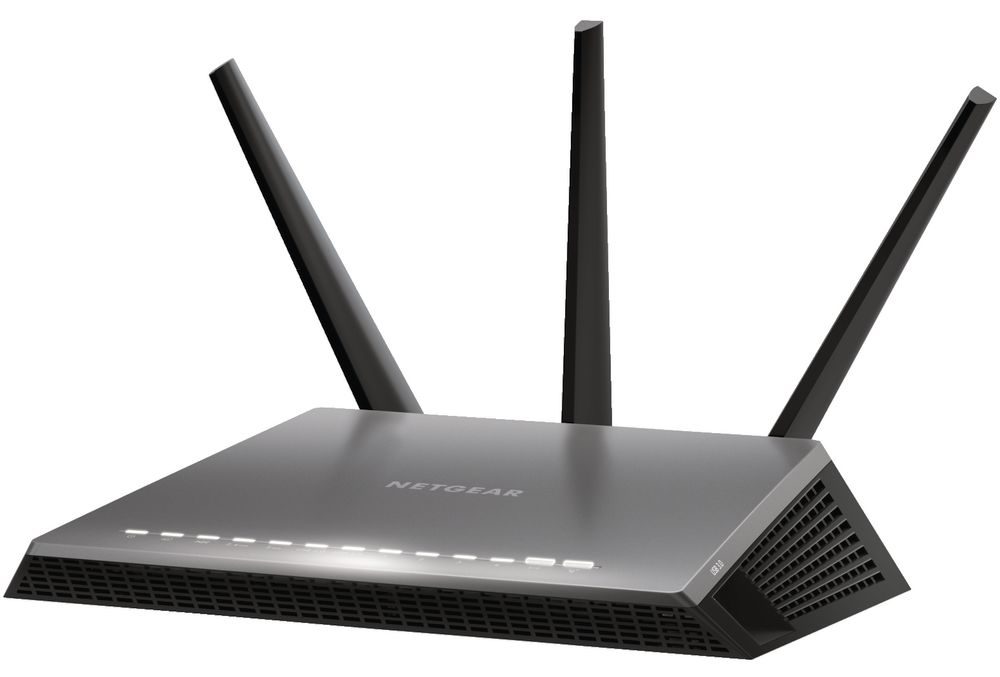
This guide covers the configuration of the NETGEAR Nighthawk D7000 for nbn connection types Fibre to the Premises (FTTP), Hybrid Fibre Coaxial (HFC), Fibre to the Curb (FTTC) and Fixed Wireless.
To set up the NETGEAR Nighthawk D7000 for nbn Fibre to the Node (FTTN) or Fibre to the Building (FTTB), refer to our FTTN/B setup guide for the NETGEAR Nighthawk D7000.
When you have received your activation email from us, you can proceed with configuring your modem/router to connect to the internet.
Step 1
Ensure your modem/router is plugged in to the wall and powered ON. Once your device has powered on, perform a HARD RESET to clear any previous ISP settings. To perform a hard reset:
- Locate the small ‘RESET’ hole on your device.
- Insert a small pin into the ‘RESET’ hole, and hold for 10 seconds, ensuring you are toggling the button inside.
- You should see your device’s lights flicker or toggle. Your device will begin the reset sequence – allow up to 5 MINUTES for this to take place.
Once your device has finished performing the reset sequence, you will now need to plug an RJ-45 ethernet cable from the LAN4/WAN port on the back of your modem/router to the UNI-D port on your nbn device (as per your activation instructions).
Your device should connect to the internet straight away, however allow up to 2 minutes for this.
If your device has connected to the internet, great! You do not need to proceed any further.
If you are still offline, proceed to next steps below for an alternate option to try and get online.
Step 2
Ensure that Wi-Fi is enabled on the device you are using to access your modem (e.g. computer/laptop/smartphone/tablet). If you are using a smartphone or tablet, you should turn off your mobile data connectivity or any hotspot connection during this process.
Connect to the Wi-Fi/Wireless network of the NETGEAR Nighthawk D7000 modem on your computer/laptop/smartphone/tablet. To connect to the Wi-Fi network of the NETGEAR Nighthawk D7000 modem, locate the Wi-Fi network name being broadcast by the modem from your device (e.g. computer/laptop), select this network, then enter the password for this network when prompted.
If you are unsure of the Wi-Fi password, this will be printed on the sticker on the back of the NETGEAR Nighthawk D7000, underneath the barcodes.
PLEASE NOTE: YOU DO NOT NEED TO HAVE A WORKING INTERNET CONNECTION TO CONNECT TO THE WI-FI OF THE NETGEAR NIGHTHAWK D7000 MODEM OR ACCESS THE MODEM GATEWAY PAGE.
Alternatively, you can plug in an RJ-45 Ethernet cable from your computer or laptop to one of the four (4) yellow Ethernet ports on the back of the NETGEAR Nighthawk D7000 modem.
Step 3
IMPORTANT: Before you attempt to log in to the NETGEAR Nighthawk D7000 modem, remove the Ethernet (RJ-45) cable from the back of the modem. The only cable that should be connected is the power supply.
Open your web browser (e.g. Google Chrome/Internet Explorer/Mozilla Firefox/Microsoft Edge), enter 192.168.0.1 into the address bar and press Enter.
If successful, a login box or window should appear asking for a username and password. If the login box or window does not appear, you can try www.routerlogin.net instead of 192.168.0.1.
Enter admin for the username and password for the password.
If the above login doesn’t work, the password will be printed on the sticker on the back of the NETGEAR Nighthawk D7000 modem. Enter this password.
Step 4
Once you have logged in, the next set of instructions may differ depending on whether your NETGEAR Nighthawk D7000 modem is brand new, or if the modem has been used previously.
You should see two tabs located in the top-left corner of the page showing ‘BASIC‘ and ‘ADVANCED‘. Click ADVANCED.
You will then see a list of options on the left side of the page. Click ‘SETUP‘. Then click ‘WAN SETUP‘.
Change the WAN Preference field to ‘MUST USE ETHERNET WAN‘, then press the green APPLY button. The modem will then reboot, please allow a few minutes.
After allowing the modem to reboot, you should see two tabs located in the top-left corner of the page showing ‘BASIC‘ and ‘ADVANCED‘. If you have been logged out of the page follow steps 2 and 3 again to get back into the NETGEAR modem page.
Click BASIC. You will then see a list of options on the left side of the page. Click ‘INTERNET‘.
This should now open up a page on the right side of the screen titled INTERNET SETUP. There will now be multiple options presented. You will need to enter/select these options as follows:
Select Country: Australia
Select Internet Service Provider: Other
Transfer Modem: This should be greyed out/not selectable
DSL Mode: This should be greyed out/not selectable
Enable this interface: Ticked (Enabled)
Use VLANID: Unticked (greyed out/not selectable)
Does your connection require a login: No
Encapsulation: Dynamic IP (Internet Protocol over Ethernet)
Leave all other options as they are and press the ‘APPLY‘ button at the top of the screen.
Your modem should now be connected to the internet. Allow up to 5 minutes for your device to come online.
If you are still offline, proceed with the PPPoE configuration instructions below to get online.
Get online with PPPoE - Step 1
Ensure that Wi-Fi is enabled on the device you are using to access your modem (e.g. computer/laptop/smartphone/tablet). If you are using a smartphone or tablet, you should turn off your mobile data connectivity or any hotspot connection during this process.
Connect to the Wi-Fi/Wireless network of the NETGEAR Nighthawk D7000 modem on your computer/laptop/smartphone/tablet. To connect to the Wi-Fi network of the NETGEAR Nighthawk D7000 modem, locate the Wi-Fi network name being broadcast by the modem from your device (e.g. computer/laptop), select this network, then enter the password for this network when prompted.
If you are unsure of the Wi-Fi password, this will be printed on the sticker on the back of the NETGEAR Nighthawk D7000, underneath the barcodes.
PLEASE NOTE: YOU DO NOT NEED TO HAVE A WORKING INTERNET CONNECTION TO CONNECT TO THE WI-FI OF THE NETGEAR NIGHTHAWK D7000 MODEM OR ACCESS THE MODEM GATEWAY PAGE.
Alternatively, you can plug in an RJ-45 Ethernet cable from your computer or laptop to one of the four (4) yellow Ethernet ports on the back of the NETGEAR Nighthawk D7000 modem.
Get online with PPPoE - Step 2
IMPORTANT: Before you attempt to log in to the NETGEAR Nighthawk D7000 modem, remove the Ethernet (RJ-45) cable from the back of the modem. The only cable that should be connected is the power supply.
Open your web browser (e.g. Google Chrome/Internet Explorer/Mozilla Firefox/Microsoft Edge), enter 192.168.0.1 into the address bar and press Enter.
If successful, a login box or window should appear asking for a username and password. If the login box or window does not appear, you can try www.routerlogin.net instead of 192.168.0.1.
Enter admin for the username and password for the password.
If the above login doesn’t work, the password will be printed on the sticker on the back of the NETGEAR Nighthawk D7000 modem. Enter this password.
Get online with PPPoE - Step 3
Once you have logged in, the next set of instructions may differ depending on whether your NETGEAR Nighthawk D7000 modem is brand new, or if the modem has been used previously.
You should see two tabs located in the top-left corner of the page showing ‘BASIC‘ and ‘ADVANCED‘. Click ADVANCED.
You will then see a list of options on the left side of the page. Click ‘SETUP‘. Then click ‘WAN SETUP‘.
Change the WAN Preference field to ‘MUST USE ETHERNET WAN‘, then press the green APPLY button. The modem will then reboot, please allow a few minutes.
After allowing the modem to reboot, you should see two tabs located in the top-left corner of the page showing ‘BASIC‘ and ‘ADVANCED‘. If you have been logged out of the page follow steps 1 and 2 again to get back into the NETGEAR modem page.
Click BASIC. You will then see a list of options on the left side of the page. Click ‘INTERNET‘.
This should now open up a page on the right side of the screen titled INTERNET SETUP. There will now be multiple options presented. You will need to enter/select these options as follows:
Select Country: Australia
Select Internet Service Provider: Other
Transfer Modem: This should be greyed out/not selectable
DSL Mode: This should be greyed out/not selectable
Enable this interface: Ticked (Enabled)
Use VLANID: Unticked (greyed out/not selectable)
Does your connection require a login: Yes
Encapsulation: PPPoE (PPP over Ethernet)
—
Login: [email protected] (your MATE service username would have been emailed to you during the order process)
Password: 1234567 (your MATE service password would have been emailed to you during the order process)
Leave all other options as they are and press the ‘APPLY‘ button at the top of the screen.
Get online with PPPoE - Step 4
You now need to plug your NETGEAR Nighthawk D7000 modem into your nbn™ device using an RJ-45 Ethernet cable.
One end of the Ethernet cable needs to be plugged into the red port labelled INTERNET on the back of the modem and the other end into the active port on your nbn™ device – this will either be a numbered UNI-D port (such as UNI-D 1, UNI-D 2 etc.) or a GATEWAY port.
If you are unsure which port to plug into on your nbn™ device, please refer to your MATE activation email and SMS which specifies the correct port.
If you have configured and plugged in your router correctly, the Internet light on the front of your modem (highlighted in the image below) should illuminate. This may take up to five (5) minutes.
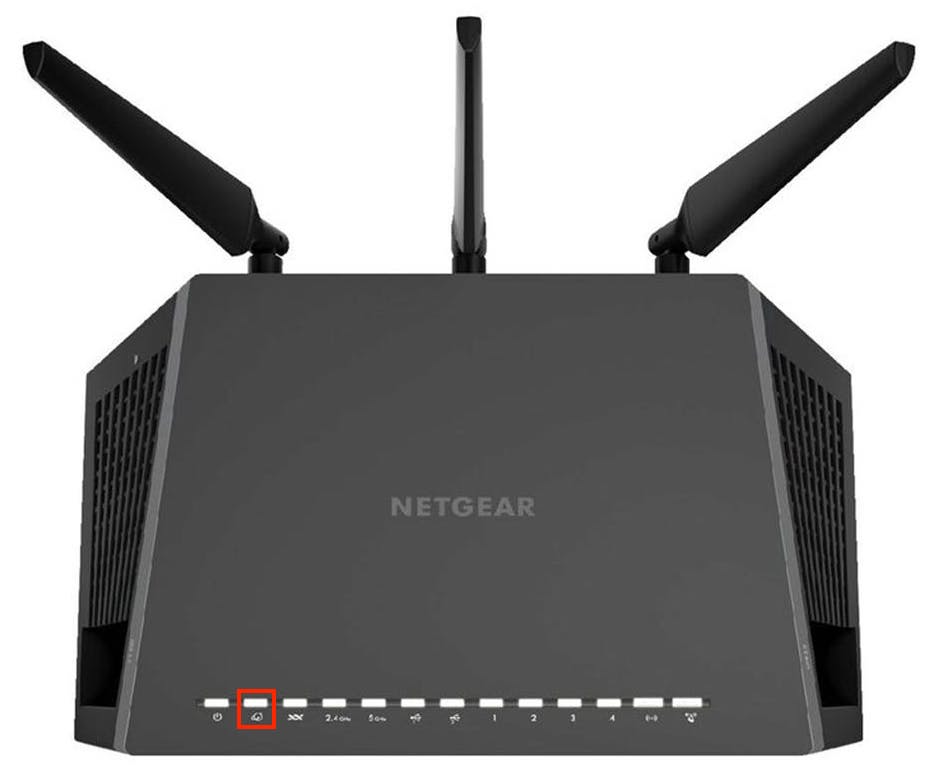
If the Internet light does not illuminate after five (5) minutes, please contact our support team for further troubleshooting.