step 1 - connect your ATA to your router/modem
The Grandstream HT801 is a one-port analog telephone adapter (ATA), while the HT802 is a 2-port analog telephone adapter (ATA).
The ATA device needs to be connected to your router/modem to work.
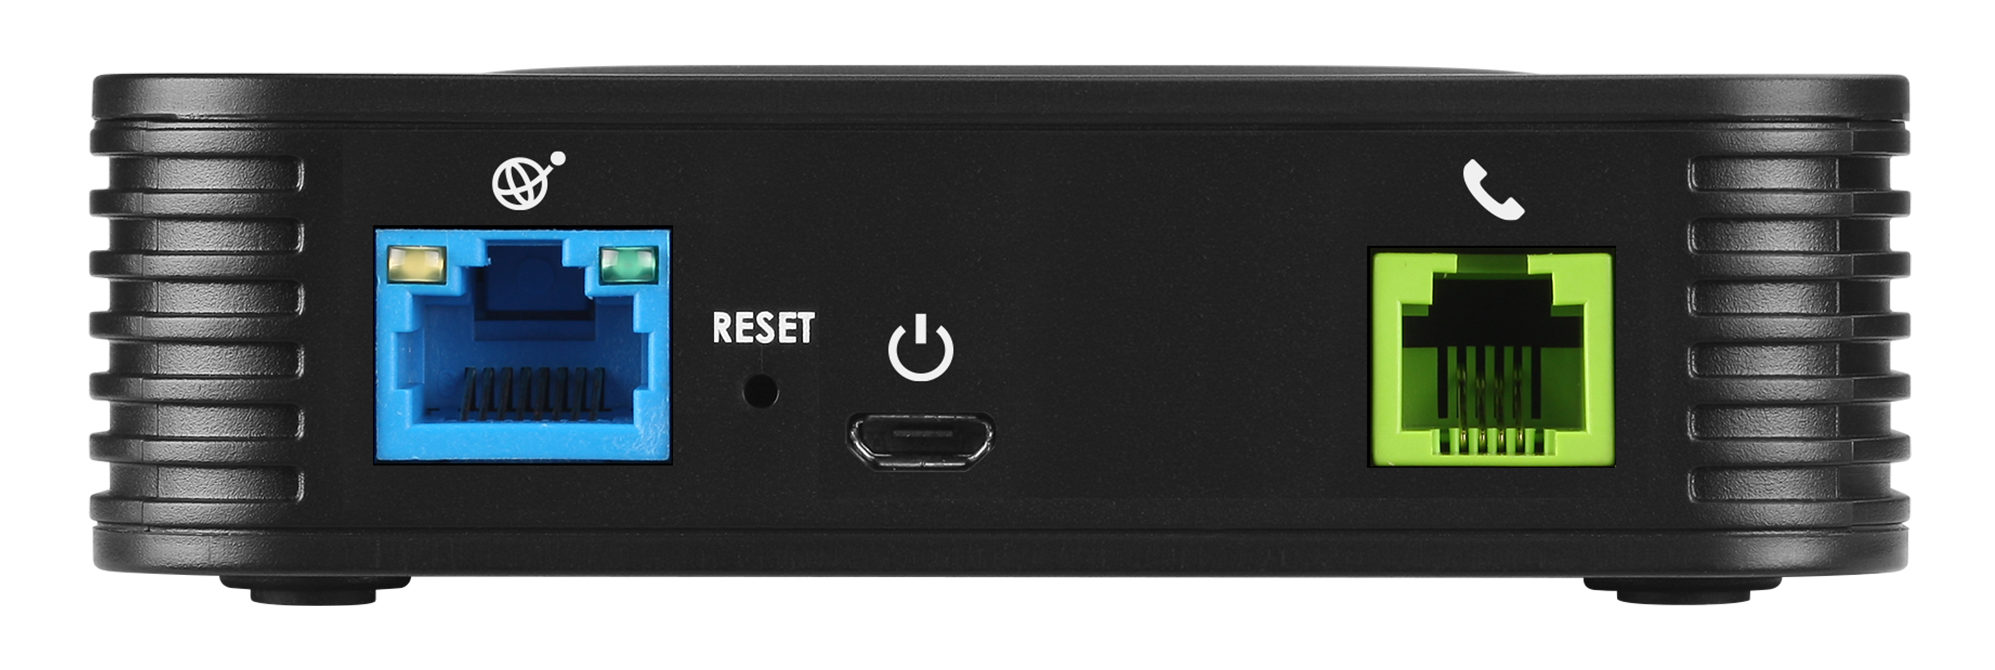
Plug the micro USB end of the supplied power adapter into the power port on the back of the ATA.
Plug the other end of the supplied power adapter into a power outlet and switch the power outlet on.
Plug one end of the supplied Ethernet cable into the BLUE internet port on the back of the ATA. Plug the other end of the supplied Ethernet cable into a LAN port on the back of your modem/router. These are usually yellow ports labelled 1 – 4.
Plug your telephone handset into the GREEN phone port on the back of the ATA. If your ATA device has two green phone ports, plug the phone into the port labelled number 1.
step 2 - connect and log in to your ATA
Pick up your phone handset and dial *** to access the voice menu. Then press 02 on your phone handset and the current IP address should be announced over the phone.
Open your web browser (e.g. Google Chrome/Internet Explorer/Mozilla Firefox/Microsoft Edge) and enter the IP address that was announced into the address bar and press Enter;
(For example, if the IP address announced was 190.190.1 then you would enter 190.190.1 into your web browser).
If successful, a login box or window should appear asking for a username and a password. Enter admin for the username and admin for the password and then press “LOGIN“.

step 3 - enter the settings into your ATA
You will now be taken to the Grandstream Device Configuration page.
You should see four options along the top of the page – STATUS, BASIC SETTINGS, ADVANCED SETTINGS and FXS PORT. Click FXS PORT or FXS PORT 1.
There will now be multiple options presented. You will need to enter/select these options exactly as follows:
- Account Active: YES
- Primary SIP Server: voice.mibroadband.com.au
- Failover SIP Server: leave blank
- Prefer Primary SIP Server: NO
- Outbound Proxy: voice.mibroadband.com.au
- Allow DHCP Option 120(override SIP server): NO
- SIP Transport: UDP
- NAT Traversal: NO
- SIP User ID: 0000000000 (your MATE nbn phone number including area code – this was emailed to you)
- Authenticate ID: 0000000000 (your MATE nbn phone number including area code – this was emailed to you)
- Authenticate Password: 1234567 (your MATE nbn phone password – this was emailed to you)
Press Apply at the bottom of the page to save these settings.

step 4 - confirm your home phone is working
Once you have entered the correct settings into your ATA, the Power, Internet and Phone LEDs will be solidly lit in blue when the Grandstream HT801/HT802 is ready for use.
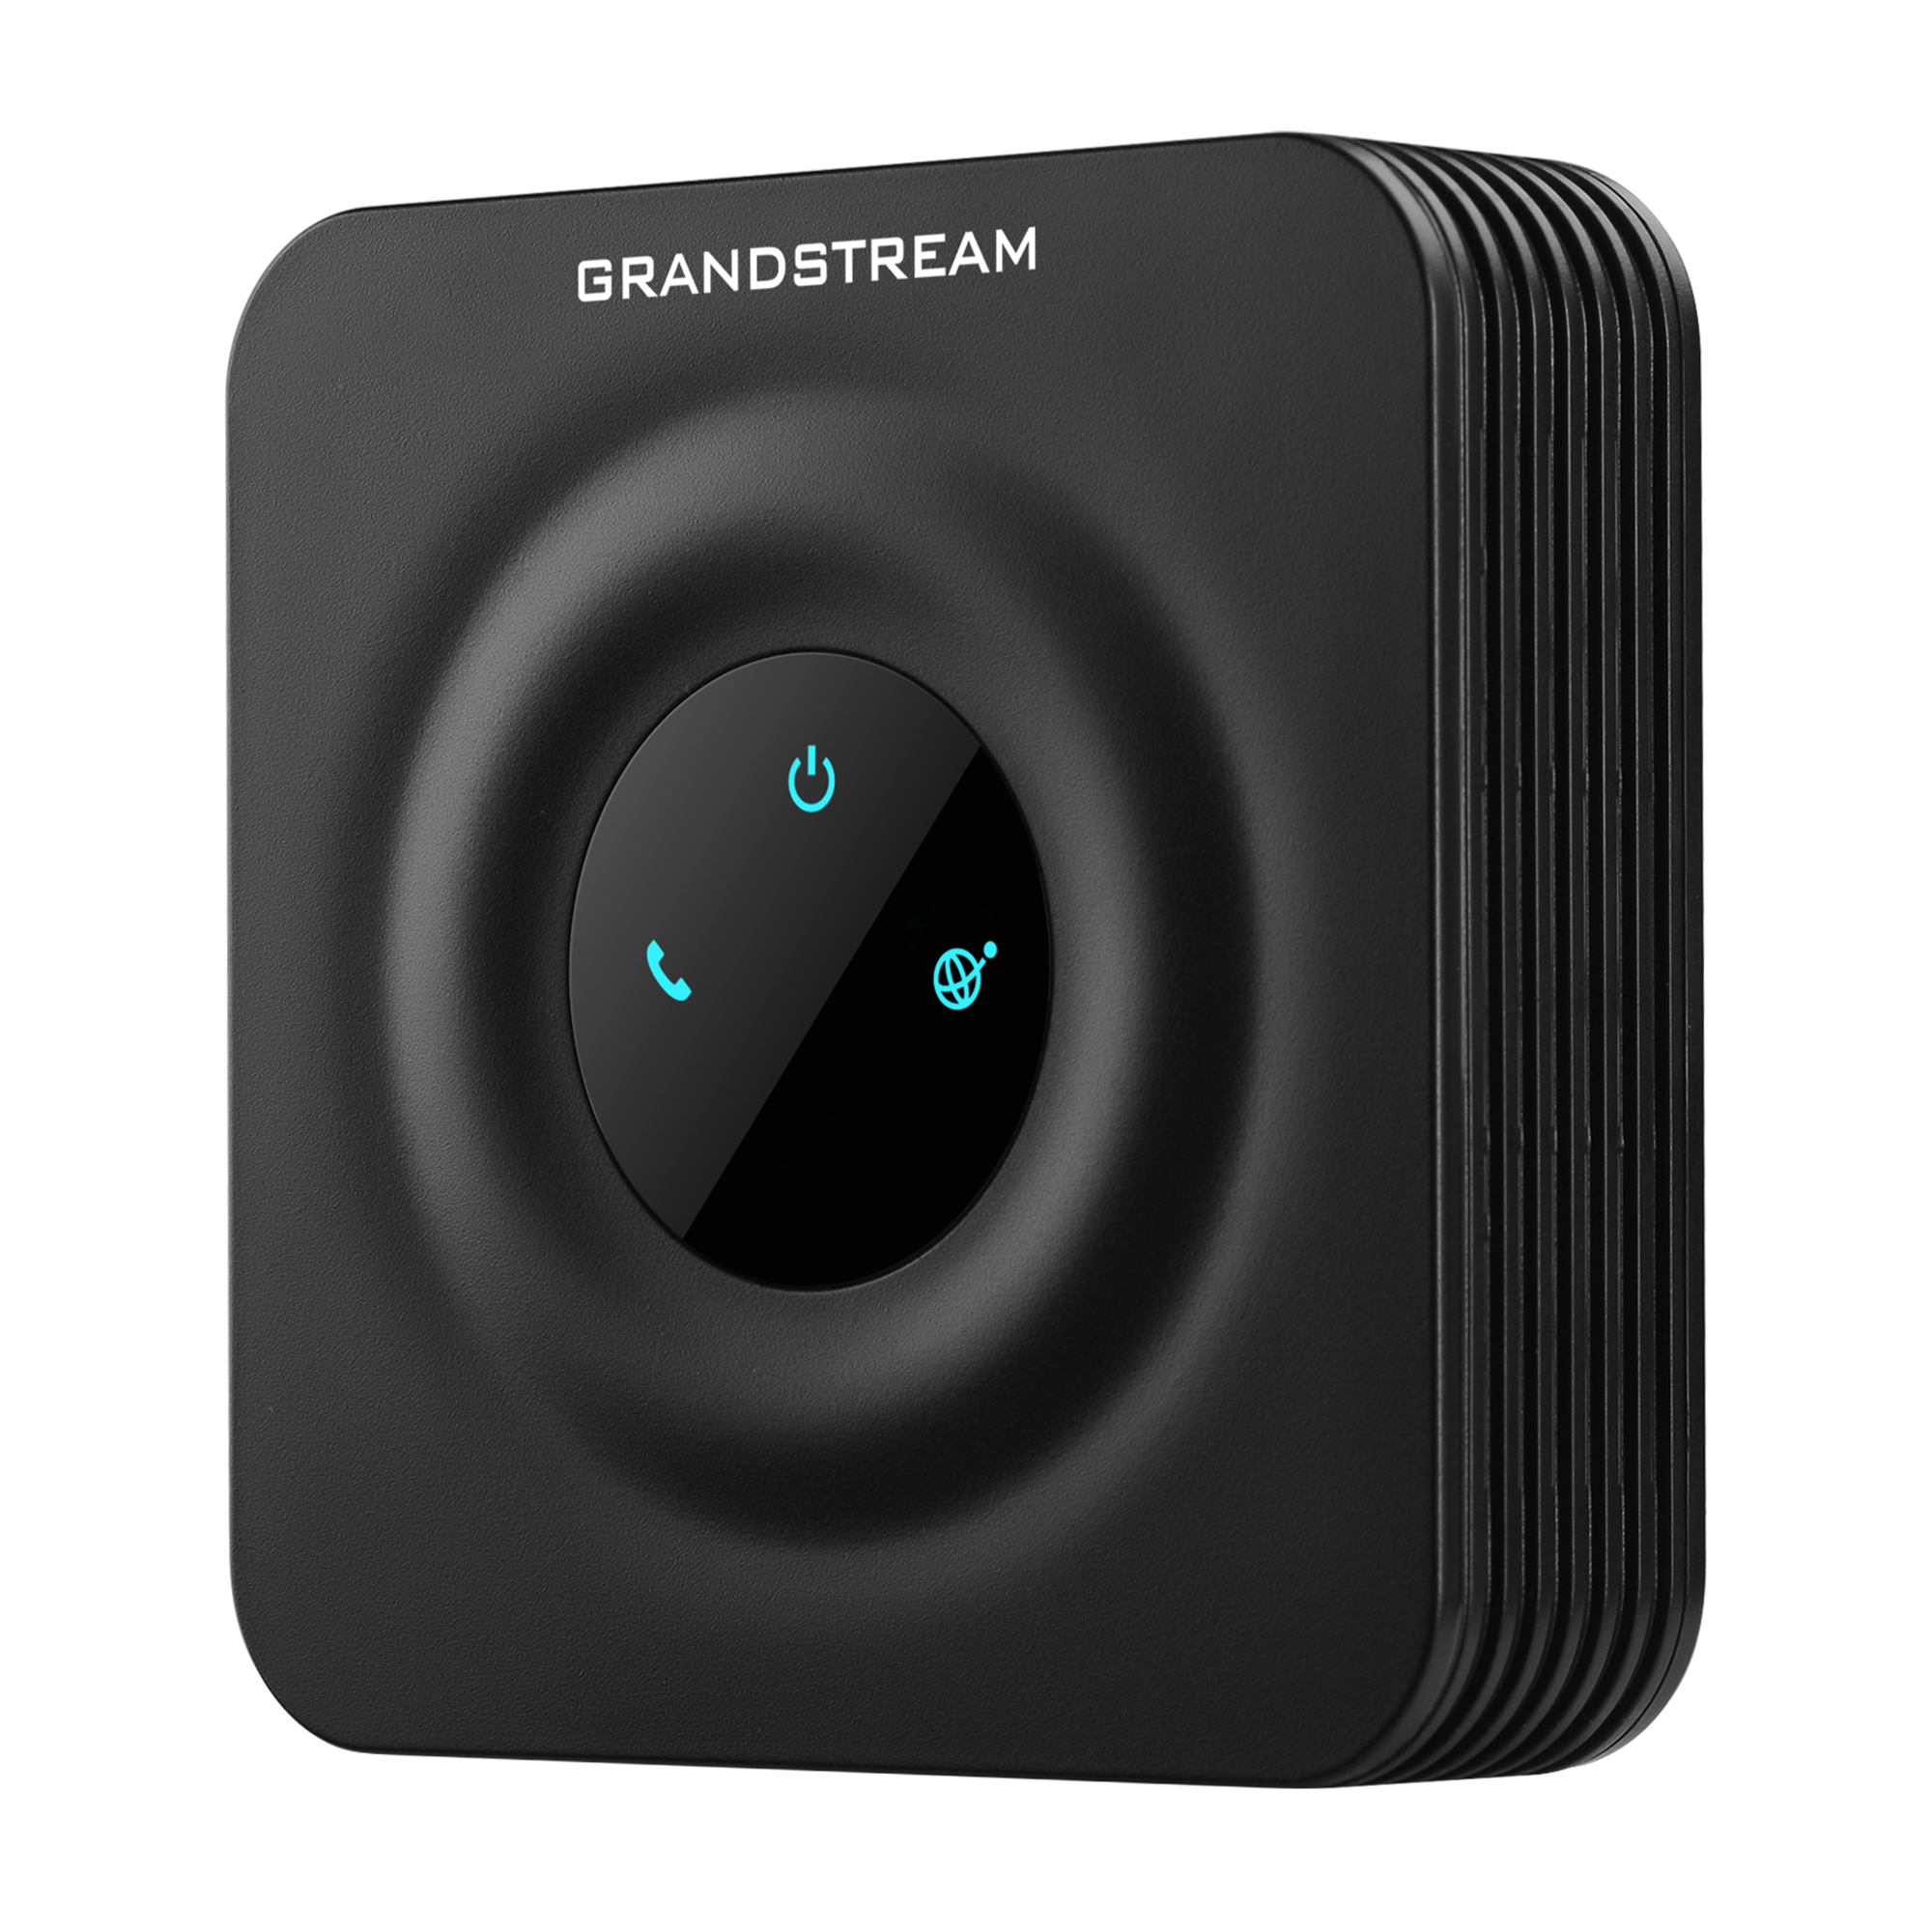
If the Power light (power indicator) is not solid blue, check that your ATA is plugged in correctly to a power outlet and that the power outlet is switched on.
If the Internet light (globe/planet indicator) is not solid blue, check that your ATA is plugged in correctly to your modem/router’s LAN port and that your modem/router is switched on.
If the Phone light (phone indicator) is not solid blue, the settings in step 3 may have not been entered correctly. Double-check the settings you have entered.
If you require further assistance, please contact our support team for further troubleshooting.