nbn Fixed Wireless – MATE modem setup guide

Step 1: Locate the nbn connection box

Find the indoor nbn Fixed Wireless connection box in your home. This will usually be installed in a garage or main living area, but may be located in an odd location such as a wardrobe, cupboard or underneath a staircase.

Ensure you check your entire home for the nbn Fixed Wireless connection box including any unusual places that you may not expect.

Nbn Co Device (1)

Step 2: Connect your MATE modem

You will need to plug your MATE modem into your nbn Fixed Wireless connection box.

First, ensure that the included power cable from the power port on the back of the nbn Fixed Wireless connection box is plugged in and secure. Plug the other end of the power cable into a power wall outlet in your home and switch the powerpoint on.

After a few minutes, you should notice the POWER, STATUS and ODU lights on the front of the device turn solid green. You should also see at least one SIGNAL STRENGTH light on (this will usually be flashing).

💡 Tip: If the STATUS or ODU lights on your nbn Fixed Wireless connection box remain red or are off, please contact our support team for further troubleshooting.

Now, take your MATE modem power supply cable and use it to connect your modem power port to an electrical outlet. Switch the power outlet on.

Nbn Device (1)

Take the included Ethernet cable and plug one end into the required port marked UNI-D or PORT on the bottom of the nbn Fixed Wireless connection box.

The active UNI-D/PORT would have been sent to you via email and SMS – in many cases, this is usually UNI-D/PORT 1 but may be another number such as UNI-D/PORT 2, UNI-D/PORT 3 or UNI-D/PORT 4.

Nbn Connection Box (1)

Plug the other end of this Ethernet cable into the WAN or WAN/LAN port on your MATE modem.

Step 3: Connect devices to your MATE modem

Your MATE modem comes pre-configured and does not require any setup. Your MATE modem will begin broadcasting Wi-Fi as soon as it is plugged into power, turned on and has finished booting up. You can then connect your devices such as computers, phones and tablets via Wi-Fi.

📶 Pro tip: We highly recommend connecting to the 5GHz Wi-Fi network where possible as this offers much faster speeds than 2.4GHz. Learn why here.


TP-Link HB210 Pro

Above: MATE TP-Link HB210 Pro


Vx230v + Vr400

Above Left: MATE TP-Link VX230v | Above Right: MATE TP-Link Archer VR400


Vr1600v + Nf18acv

Above Left: MATE TP-Link Archer VR1600v | Above Right: MATE NetComm NF18ACV

The modem’s Wi-Fi name and password is printed on the bottom of the modem. Depending on which MATE modem you have this will be referred to differently.

MATE TP-Link HB210 Pro, VX230v, Archer VR400 or VR1600v:

  • Wi-Fi network name – SSID
  • Wi-Fi password – Wireless Password/PIN

MATE NetComm NF18ACV:

  • Wi-Fi network name – 2.4GHz WiFi Network Name / 5GHz WiFi Network Name
  • Wi-Fi password – 2.4GHz WiFi Password / 5GHz WiFi Password


TP-Link HB210 Pro WiFi details

Above: MATE TP-Link HB210 Pro

TP-Link VX230v WiFi sticker

Above: MATE TP-Link VX230v

MATE TP-Link Modem Wi Fi details - VR400 and VR1600v

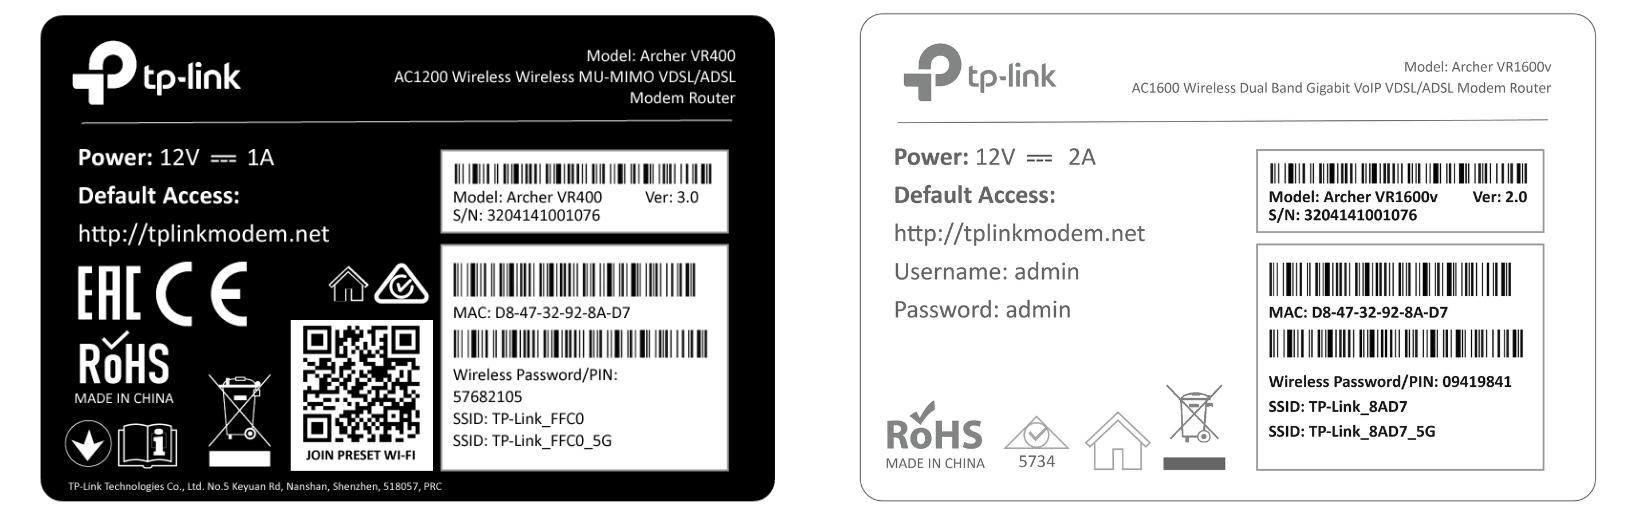
Above Left: MATE TP-Link Archer VR400 | Above Right: MATE TP-Link Archer VR1600v

MATE Netcomm Modem Wi Fi details

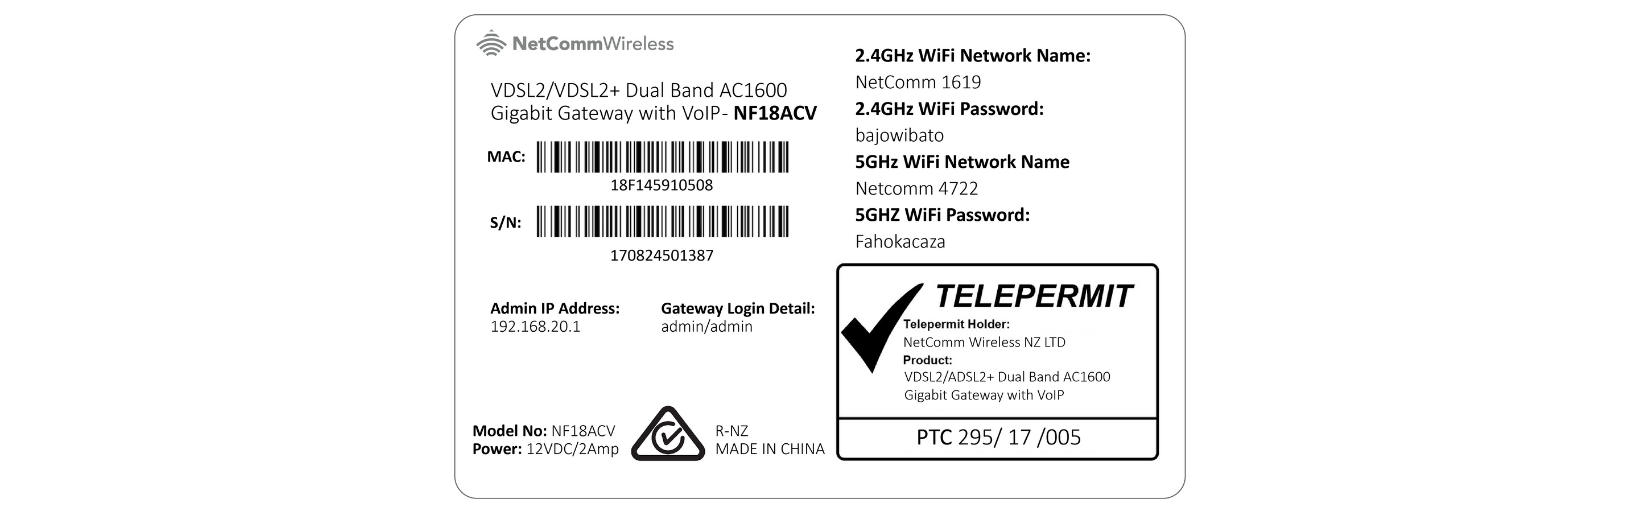
Above: MATE NetComm NF18ACV

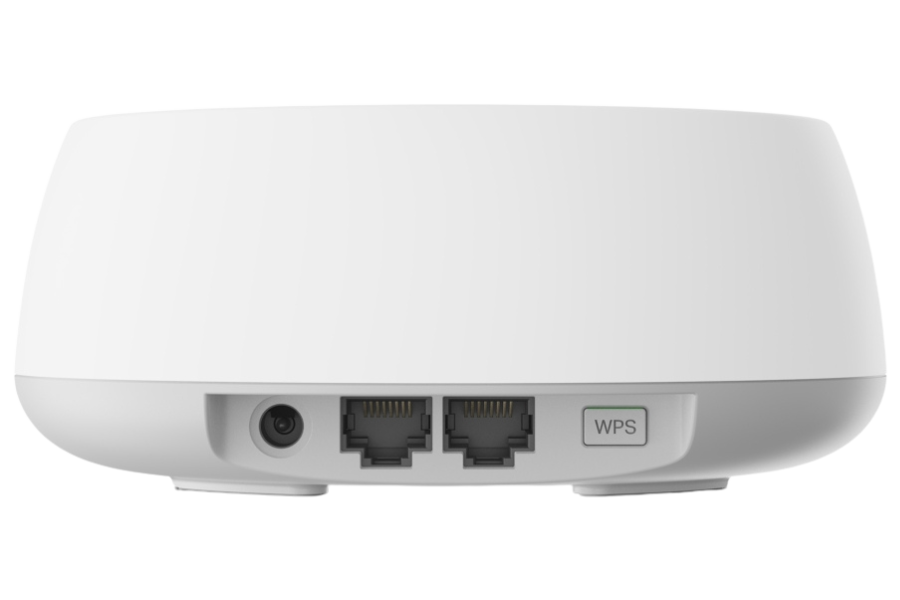
If you have a computer nearby that you would like to connect via Ethernet, take another Ethernet cable and plug one end into any one of the modem’s Ethernet ports (labelled LAN).

💬 Need help? If you have issues connecting your MATE supplied modem, please contact our support team for further troubleshooting.